DIY front upper ball joint replacement. 2004 Maserati.
Tools 22 mm 13 mm wrench, 5 mm allen wrench, Ball joint remove tool,(pickle fork). Impact hammer.
Jack up your car and remove the wheel. Put a support under the lower A arm. You will need to lower the car to lift the arm to get at the two 13 mm bolts.
Start your car, turn your wheel so you can access the rear of your arms.
Now remove the small black box with your 5 mm allen wrench. Third pic. Pull the brake hoses from their supports. Four all together. This will allow access to the 22 mm nut on the bottom of your joint.
Use your 22 mm wrench to remove the nut on the end of your ball joint. Slide your pickle fork between the ball joint and the spindle, If you’re lucky, when you hammer on it the tapered end will pop out of your spindle. Mine didn’t come loose. I had to use an air hammer on the end of the ball joint to push it out. When I did, the bushing between the tapered ball joint and the spindle came out with the ball joint. Take the ball joint and bushing to the bench where you can hammer on it better. The bushing should pop off. Now you will need to get the bushing back into the spindle. Put the bushing in the freezer, or on dry ice, heat the spindle with a propane torch. This will make it easier to get the bushing back into the spindle. Start the bushing into the spindle carefully, then hammer until it is seated up snug. There is a fabric loop around the rubber part of the ball joint. I had to rip the sewing and take it off. It is easy to sew it back together. While you are working at getting the ball joint to pop off, it might be easier to take the two 13 mm nuts off the A arm, so you can get at the ball joint.
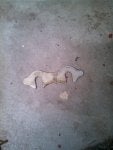
There are two 13 mm nuts that hold the ball joint to the upper arm. Remove them. You might need to lower the car a bit to get the nuts off. The shock spring is in the way. Don’t lose the spacer between the ball joint and the arm. First pic.
A new ball joint costs between $200 and $350. Be careful. I ordered one from a Maserati parts company and got a remanufactured part with the wrong size tapered end.
Now clean everything off so when you put it back together, it will fit tight.
To install:
Don’t forget to slide the fabric over your new ball joint. Slide the tapered end into the spindle. Put the spacer back over the two bolts and slide into the upper arm. I use blue lock tight on all the threads. Tighten the two 13 mm nuts. The tricky part is to tighten the 22 mm nut on the bottom of your ball joint. Don’t forget the big washer. The shaft wants to turn while you are tightening the nut. I just lightly tapped on the top of the ball joint to seat it into the spindle.
Reinstall the little black box with your 5 mm allen wrench, and secure your break lines.
DONE!
First photo. The spacer between the Ball joint and the A arm.
Second photo. Air hammer with a pointed end.
Third photo. The two 5 mm allen bolts to remove the black box.
Tools 22 mm 13 mm wrench, 5 mm allen wrench, Ball joint remove tool,(pickle fork). Impact hammer.
Jack up your car and remove the wheel. Put a support under the lower A arm. You will need to lower the car to lift the arm to get at the two 13 mm bolts.
Start your car, turn your wheel so you can access the rear of your arms.
Now remove the small black box with your 5 mm allen wrench. Third pic. Pull the brake hoses from their supports. Four all together. This will allow access to the 22 mm nut on the bottom of your joint.
Use your 22 mm wrench to remove the nut on the end of your ball joint. Slide your pickle fork between the ball joint and the spindle, If you’re lucky, when you hammer on it the tapered end will pop out of your spindle. Mine didn’t come loose. I had to use an air hammer on the end of the ball joint to push it out. When I did, the bushing between the tapered ball joint and the spindle came out with the ball joint. Take the ball joint and bushing to the bench where you can hammer on it better. The bushing should pop off. Now you will need to get the bushing back into the spindle. Put the bushing in the freezer, or on dry ice, heat the spindle with a propane torch. This will make it easier to get the bushing back into the spindle. Start the bushing into the spindle carefully, then hammer until it is seated up snug. There is a fabric loop around the rubber part of the ball joint. I had to rip the sewing and take it off. It is easy to sew it back together. While you are working at getting the ball joint to pop off, it might be easier to take the two 13 mm nuts off the A arm, so you can get at the ball joint.
There are two 13 mm nuts that hold the ball joint to the upper arm. Remove them. You might need to lower the car a bit to get the nuts off. The shock spring is in the way. Don’t lose the spacer between the ball joint and the arm. First pic.
A new ball joint costs between $200 and $350. Be careful. I ordered one from a Maserati parts company and got a remanufactured part with the wrong size tapered end.
Now clean everything off so when you put it back together, it will fit tight.
To install:
Don’t forget to slide the fabric over your new ball joint. Slide the tapered end into the spindle. Put the spacer back over the two bolts and slide into the upper arm. I use blue lock tight on all the threads. Tighten the two 13 mm nuts. The tricky part is to tighten the 22 mm nut on the bottom of your ball joint. Don’t forget the big washer. The shaft wants to turn while you are tightening the nut. I just lightly tapped on the top of the ball joint to seat it into the spindle.
Reinstall the little black box with your 5 mm allen wrench, and secure your break lines.
DONE!
First photo. The spacer between the Ball joint and the A arm.
Second photo. Air hammer with a pointed end.
Third photo. The two 5 mm allen bolts to remove the black box.