Maserati Forum banner

How to change the oval logo badge?

2 reading
14K views 16 replies 12 participants last post by  Dennis2  
#1 ·
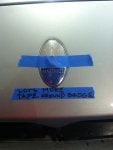
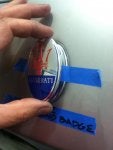
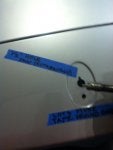
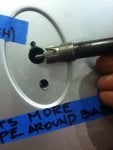
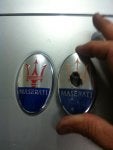
Does anyone know how to replace the oval Maserati logo badge that's on the TOP of the front bumper? I got a stone chip in mine that sorta messed up one of the red stripes and would like to replace it.
 
#2 ·
Brumma,
The emblem is simply double backed taped on. Carefully pry up on one side and work it off slowly. My techs use a small putty knife but be careful and don't scratch the paint. Might be some tape residue left on the bumper. There is a 3M production called adhesive remover that will not harm the paint. Clean the bumper surface well. New emblem will come with new double back tape so just peel backing and stick. I replaced mine and I remember them not being very expensive believe it or not. Good luck. Anymore questions let me know
ken
 
#3 ·
I've used nylon filament fishing line to work behind the emblem on my wife's Mercedes. I heated with a hair dryer and then pulled the line back & forth behind the emblem to cut through the two way tape. Then I use Goo Gone to clean it all up.
 
#4 · (Edited)
Brilliant! Elegant solution, and I can vouch for Goo-Gone to remove just about anything adhesive-related... Brumme, you might even try spraying a little around the edges of the emblem before trying Vincenzo's filament technique; might even make it a bit easier to slip n' slide the fishing line underneath.

I did something similar to remove & replace some glued-on handles on a pair of glass cabinet doors & it worked great.

Just make sure you use a few shots & wipedowns with Windex or equivalent to remove the Goo-Gone residue, followed by plain water to remove the ammonia, or you can also just wash the area really well with whatever you normally use for washing the car... if you try to re-apply anything to that area & there's any Goo-Gone residue there, it won't stick worth a damn.
 
#5 ·
STOP dont do that , its not only stuck on with double sided sticky it also has a small stud and nut and is bolted on , well atleast eruopean spec ones are , im sorry these can only be accessed by bumper removal if you go to the the Eurospares.co.uk site you can quite plainly see the stud

regards loz
 
#6 ·
removing front emblem

I agree with Loz. I tried to take mine off by first removing the grill. The grill has 3 screws at the top and it should then prise off but it was very difficult despite being able to remove the screws. I didnt want to risk damaging the grill so I left it for the time being.
 
#10 ·
Personally next time i refit the oval emblem , i will cut off the stud and just rely on the double sided sticky , these badges are quite poor quality and go milky after a couple of years after regular washing , yet to find one on a car thats had average usage that doesn't show some signs of de laminating (excepting garage queens )

Here in UK we have the occasional fad, where groups of youths go on the rampage collecting car badges /logo's one of the members on the UK forum had knife gouges and damage to the bumper where they tried unsuccessfully to get it off i feel that it had prized off easier less damage will have resulted , I would rather lose a $15 badge than have $1000 damage to the car

regards loz
 
#11 ·
Here are photos of my 12 step removal and replacement of the GranSport Front Bumper Badge using the "drill out" method. I bought item # 68332000 Maserati Oval Emblem from Ricambi for $44.00. The photos do not show the tape surrounding the badge, so MAKE SURE to use lots of tape around the badge to protect the bumper ! The process is slow and tedious, it took me about 3 hours from start to finish. As always, I look forward to constructive comments ! See next post for final photos.
 

Attachments

#14 ·
No, I did not have access to the Nut behind the badge. It is hidden inside the foam bumper filler. The intent of the "Drill Out Procedure" is to drill out the Badge Nut and Bolt from the top side of the badge...this does not require removal of the Bumper Cover or foam bumper filler. The correct, factory procedure is to remove the Bumper Cover as mentioned in other posts. I wanted to try the Drill Out Procedure instead....it works.